Our Proven Process
Every floor we coat follows the same proven 6-step process. No shortcuts, no compromises — just results that last.
Get a Free QuoteDiamond-Ground Prep Always
15-Year Written Warranty
Certified Installation Crew
Our Process
Our 6-Step Floor Coating Process
01
Free Consultation & Estimate
We start with a no-obligation on-site visit. We measure your space, assess concrete condition, discuss your finish preferences, and provide a transparent written estimate — usually within 48 hours.
02
Concrete Assessment & Testing
Before any work begins, we check your slab for moisture levels, existing coatings, and structural issues. This step prevents adhesion failures and ensures the right system is specified for your floor.
03
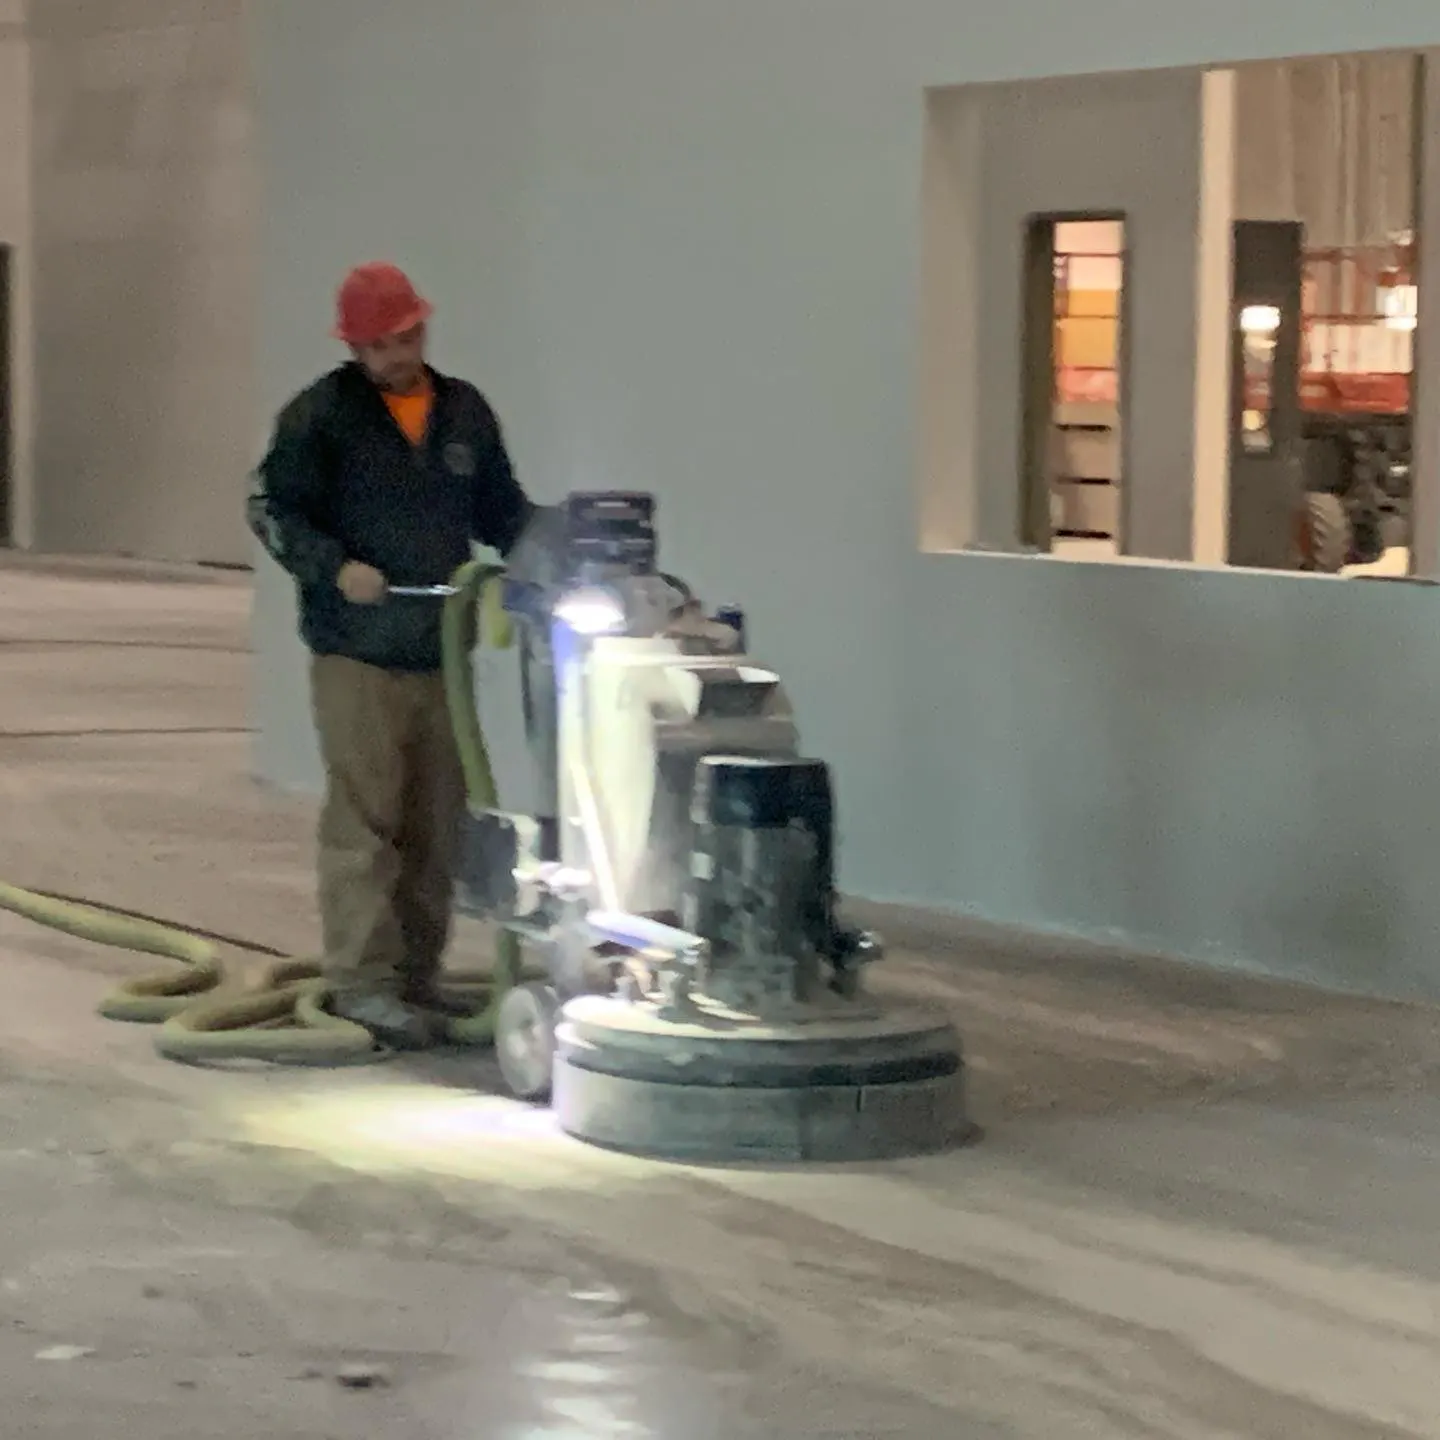
Diamond Grinding Preparation
We use industrial diamond grinders combined with HEPA vacuum systems to profile your concrete in as dust-free an environment as possible. Diamond grinding creates a consistent CSP-3 surface profile that bonds permanently with the coating system, and removes stains, old paint, and surface contaminants.
04
Primer & Moisture Mitigation
A penetrating primer seals the concrete and creates a chemical bond with the base coat. If moisture testing reveals elevated vapor transmission, we apply a moisture-mitigation barrier first to prevent future delamination.
05
Base Coat & Flake Broadcast
We roll on a pigmented base coat and broadcast decorative vinyl flake chips to full rejection — meaning the surface is completely covered. This creates the signature look while adding texture and hiding imperfections.
06
Polyaspartic Topcoat & Cure
The final layer is a optional build midcoat with a UV-stable gloss or matte polyaspartic topcoat that cures in hours, not days. It provides superior chemical resistance, won't yellow in sunlight, and delivers the glossy, easy-to-clean surface you'll enjoy for years.
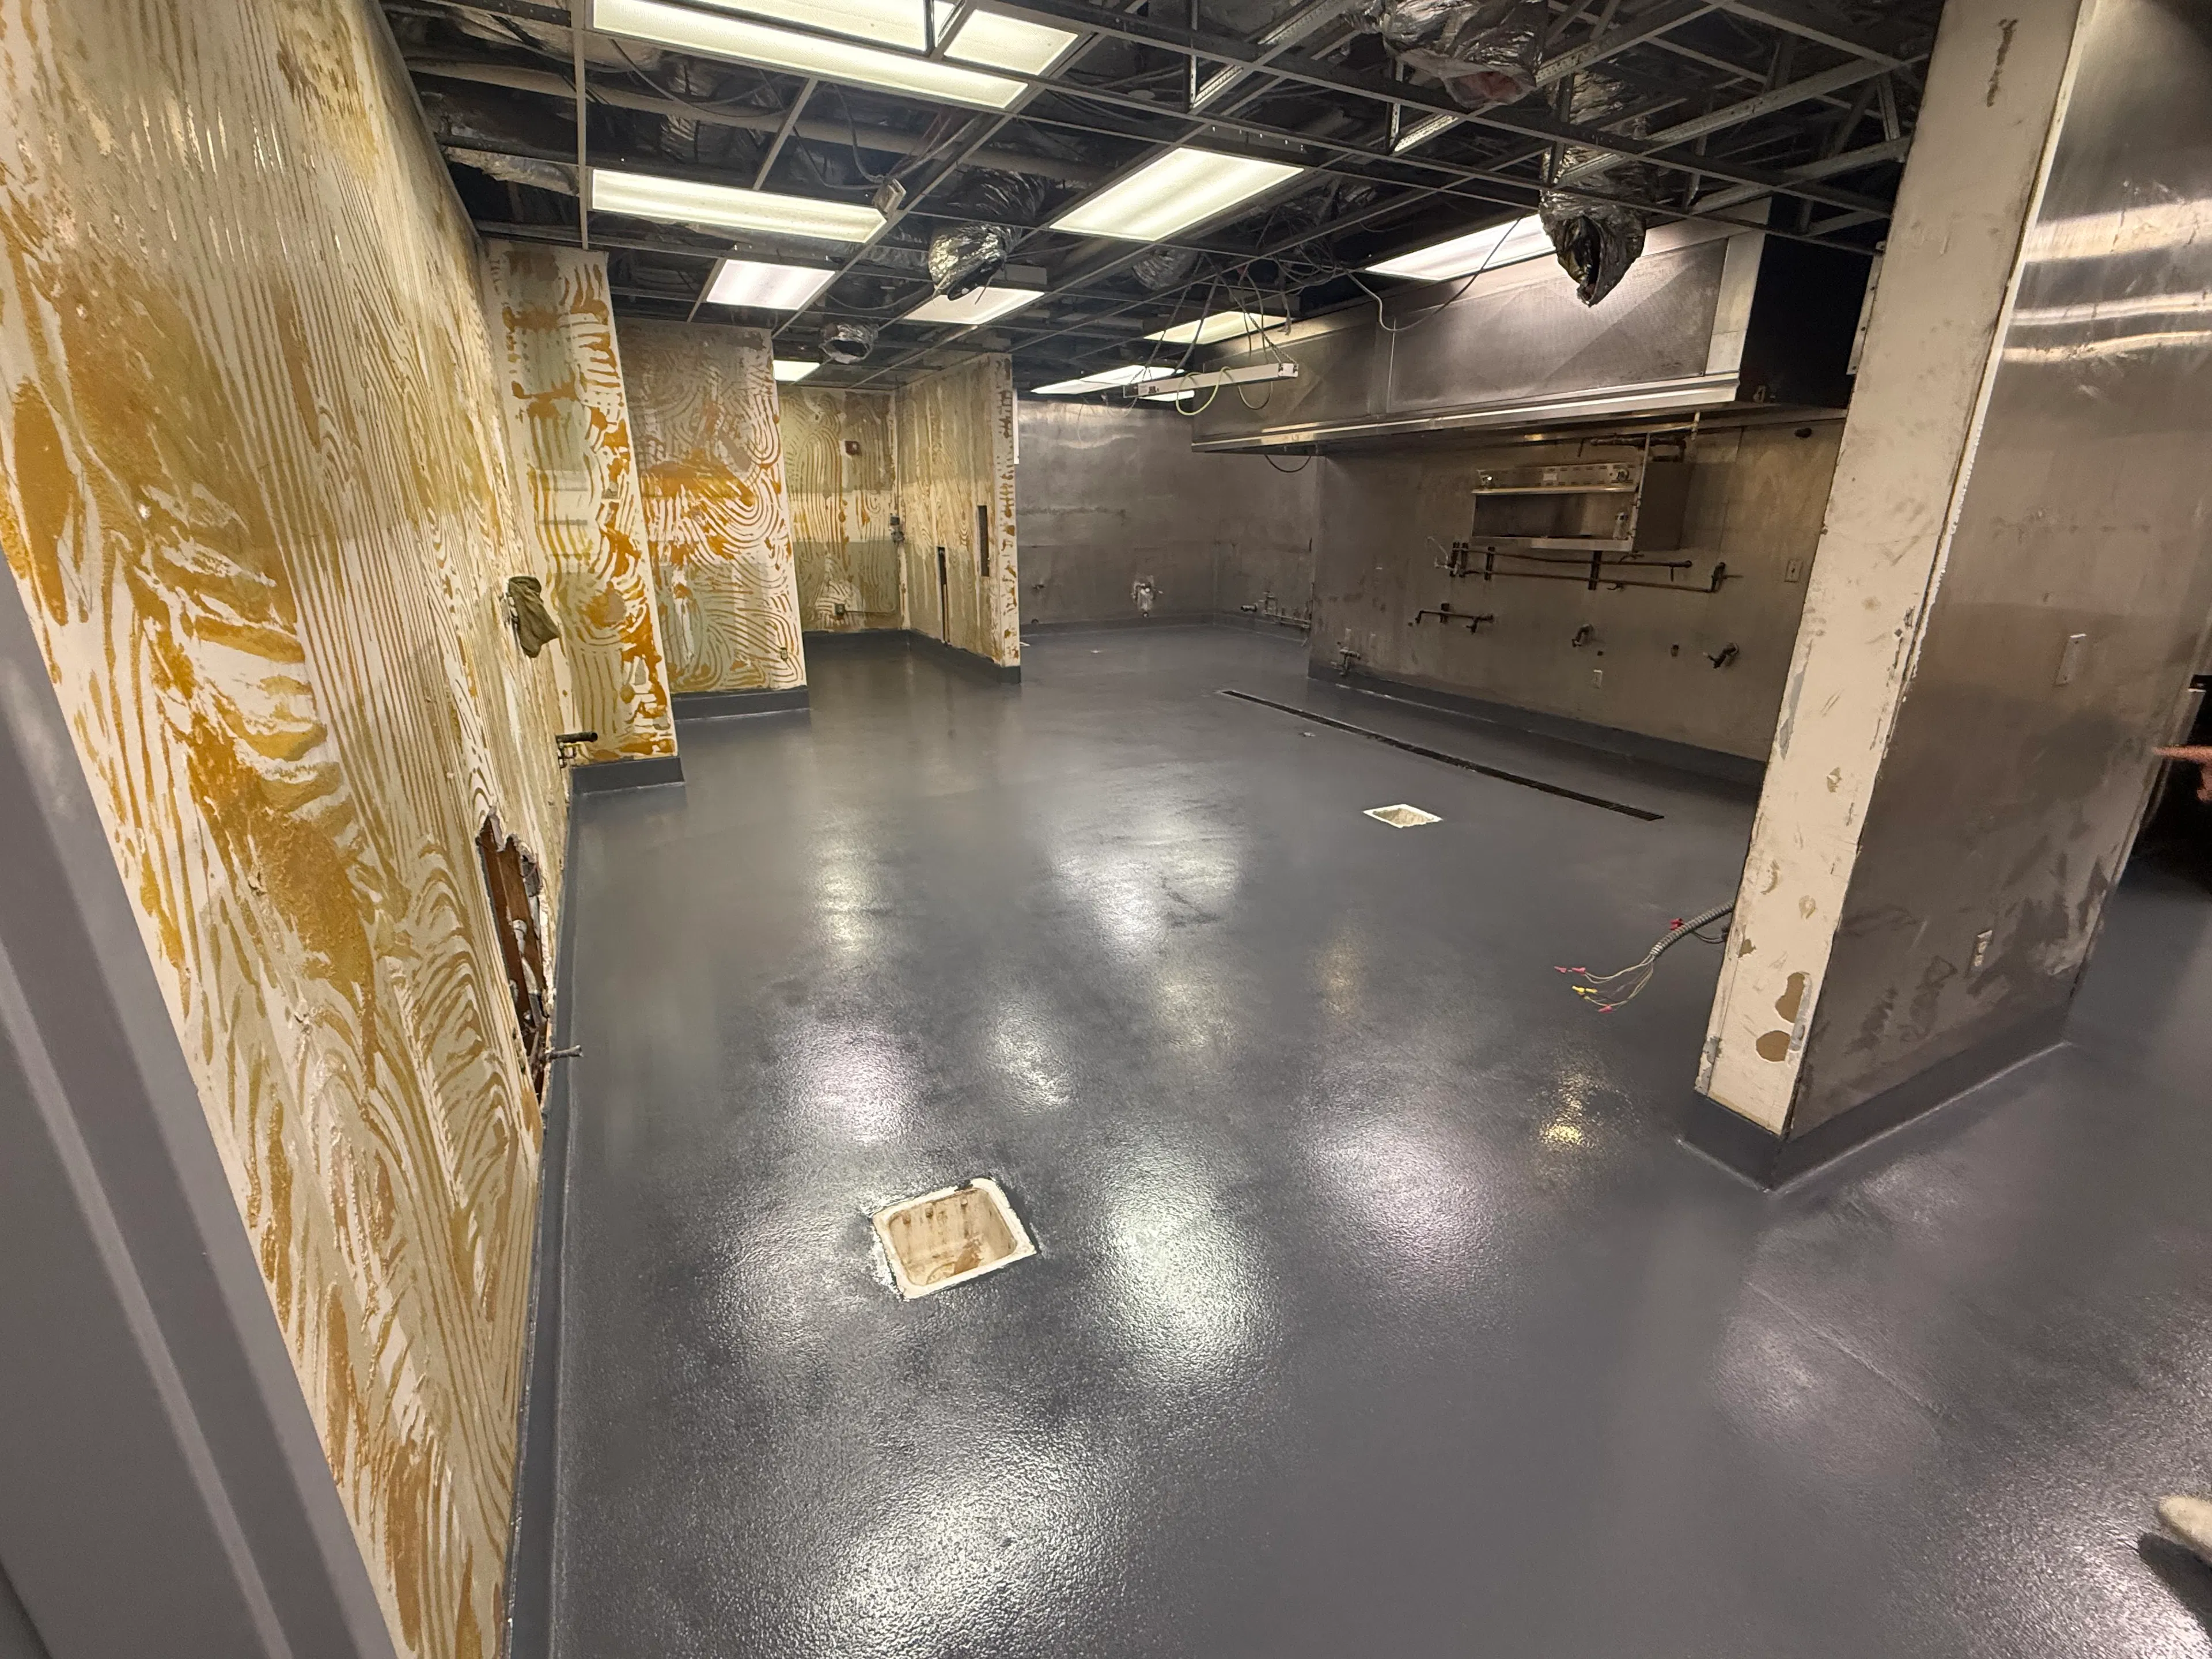
Why Surface Prep Matters
The single biggest reason floor coatings fail is poor surface preparation. Many contractors still use acid etching — a cheaper, faster method that leaves an inconsistent profile and chemical residue on the slab.
We diamond grind every floor. Industrial diamond grinders mechanically abrade the concrete to a uniform CSP-3 profile, giving the primer and base coat a consistent surface to bond with. The result is a coating that won't peel, flake, or delaminate — even under hot tires and heavy use.
It takes longer and costs more in equipment, but it's the only way to guarantee a floor that lasts. That's why we back every project with our written warranty.
See the Transformation
Every project starts with bare or damaged concrete and ends with a durable, beautiful coated surface. Here are a few recent before-and-after examples.


2-Car Garage Floor
Gilbert, AZ
Full flake polyaspartic system over bare concrete with minor oil staining


School Locker Room
Mesa, AZ
Recoat School Locker Room

Garage Makeover
Chandler, AZ
Polyaspartic Flake system with slip-resistant texture and stain resistant finish
Common Process Questions
Many residential garage floors are completed in one day, though some projects may require two days depending on preparation and conditions. Walk on the floor in approximately 6 hours. Vehicles can return within 24–48 hours. Coatings reach full chemical resistance in approximately 72 hours.
Yes — the space needs to be completely empty before we arrive. We need full access to the entire floor for grinding, cleaning, and coating. Most homeowners move items to the driveway or a storage pod for the day.
We repair cracks and spalls as part of the preparation process. Small hairline cracks are filled with flexible polyurea filler, and larger cracks or damaged areas are ground smooth and patched before coating. The finished surface will be smooth and uniform.
Diamond grinding produces a consistent mechanical profile (CSP-3) that bonds permanently with the coating. Acid etching is less predictable, leaves chemical residue, and often leads to adhesion failures. Grinding takes more equipment and time, but it's the only method we trust for a long-lasting result.
Yes — our diamond grinders remove existing paint, epoxy, and failed coatings down to bare concrete. We test the surface to make sure all previous material is removed before applying the new system. This is actually one of the most common jobs we do.
Our crew arrives in the morning with all equipment. We diamond grind the surface using grinders combined with HEPA vacuum systems — our goal is to install your floor in as dust-free an environment as possible. We then clean the floor, apply primer, roll on the base coat, broadcast the decorative flake, and finish with the polyaspartic topcoat. Most jobs wrap by mid-afternoon.
Ready to Get Started?
See our proven process in action. Get a free, no-obligation quote.
Best system for your garage/patio (epoxy + polyaspartic options)
Transparent pricing + timeline
Local team — no spam, no pressure